Master Your Kitchen: 5 Expert Organization Tips for Efficiency
Unlock the secrets to a perfectly organized kitchen with our top 5 expert tips. From decluttering strategies to smart storage solutions, discover how to create a functional and beautiful culinary space.
By: Matheus Neiva on June 22, 2026
Master Your Kitchen: 5 Expert Organization Tips for Efficiency
The kitchen, often hailed as the heart of the home, is a place where culinary magic happens, families gather, and memories are made. Yet, for many, it can also quickly become a source of stress and clutter. A disorganized kitchen can lead to wasted time searching for ingredients or tools, unnecessary expenses from duplicate purchases, and a general feeling of overwhelm. Imagine a kitchen where every item has its place, where cooking feels less like a chore and more like a joy, and where efficiency reigns supreme. This isn’t just a dream; it’s an achievable reality with the right approach to kitchen organization tips.
In this comprehensive guide, we’ll delve into five expert kitchen organization tips designed to transform your culinary space into a beacon of efficiency and order. Whether you’re a seasoned chef or a casual cook, these strategies will help you streamline your workflow, maximize your storage, and create a more enjoyable environment. We’ll cover everything from the initial decluttering phase to optimizing your pantry, drawers, and countertops, ensuring that your kitchen not only looks good but functions exceptionally well.
A well-organized kitchen isn’t just about aesthetics; it’s about functionality. When your kitchen is organized, you save time, reduce stress, and even enhance your cooking experience. No more rummaging through overflowing cabinets or hunting for that elusive spice. Instead, you’ll have a system that supports your cooking habits and makes meal preparation a breeze. So, let’s embark on this journey to a more organized and efficient kitchen, starting with the fundamental steps that will lay the groundwork for lasting order.
1. The Grand Purge: Declutter Before You Organize
Before you even think about buying storage containers or drawer organizers, the most crucial first step in any effective kitchen organization strategy is the grand purge. This involves a thorough decluttering of every single item in your kitchen. It might seem daunting, but this step is foundational to creating a truly organized space. Without it, you’re merely organizing clutter, which is a temporary fix at best.
Why Decluttering is Paramount for Kitchen Organization
Think about it: do you really need three can openers, five spatulas, or a collection of mismatched food storage containers without lids? Probably not. Excess items take up valuable space, make cabinets and drawers feel cramped, and obscure the items you actually use and love. Decluttering forces you to confront these redundancies and make intentional choices about what stays and what goes. This process is not just about physical space; it’s about mental clarity and reducing decision fatigue every time you step into your kitchen.
How to Execute the Grand Purge Effectively
Empty Everything Out: Start by completely emptying one section of your kitchen at a time – a single cabinet, a drawer, or a pantry shelf. Lay all items out on a table or countertop so you can see everything you own. This visual overload can be a powerful motivator to let go of unnecessary items.
Categorize as You Go: As you empty, begin to sort items into categories: cooking utensils, baking supplies, dinnerware, food storage, small appliances, spices, etc. This helps you grasp the true volume of each category.
Apply the ‘Three Box’ Method: For each item, ask yourself these questions:
Do I use this regularly (at least once a week or month)? If yes, it’s a keeper.
Is it broken, chipped, or expired? If yes, it’s trash or recycle.
Do I love it and does it bring me joy? (Think about sentimental items or specialized tools you genuinely enjoy using, even if infrequently).
Have I used this in the last year? If not, consider if it’s truly essential.
Based on your answers, place items into three designated boxes or piles:
Keep: Items you use, love, or truly need.
Donate/Give Away: Items in good condition that you no longer need or use but someone else might appreciate. Think about local charities, friends, or family.
Trash/Recycle: Broken items, expired food, or things that are beyond repair or use.
Be Ruthless (But Realistic): It can be hard to let go, especially of items that were gifts or expensive. However, remember your goal: a functional and efficient kitchen. If an item isn’t serving you, it’s taking up valuable space. For very specialized items you use only once a year (like a turkey baster), consider if you can borrow one or if it’s truly worth the storage space.
Address Duplicates: Many kitchens suffer from an abundance of duplicate items. Keep only the best functioning or most loved version of an item. For example, if you have multiple sets of measuring spoons, keep one complete, functional set.
Check Expiration Dates: This is especially important for pantry items, spices, and condiments. Discard anything expired or that you know you won’t use.
Benefits of a Thorough Declutter
Once the purge is complete, you’ll immediately notice a significant difference. Your cabinets will feel lighter, your drawers less jammed, and you’ll have a clearer picture of what you actually own and need. This clarity is the perfect foundation for the subsequent steps of effective kitchen organization. It ensures that every organizational effort you put in will be focused on items that genuinely contribute to your kitchen’s functionality and your cooking enjoyment. This foundational step is arguably the most impactful of all kitchen organization tips, setting the stage for a truly transformed space.
2. Zone It Out: Create Functional Workstations
After the great declutter, the next powerful step in optimizing your kitchen is to implement a zoning strategy. This involves grouping similar items together based on their function and proximity to where they are typically used. Think of your kitchen not as one large space, but as several interconnected workstations. This approach is a cornerstone of efficient kitchen organization, minimizing unnecessary movement and making every task more fluid.
Understanding Kitchen Zones
Most kitchens can be broken down into several key zones, each serving a specific purpose. By consciously organizing items within these zones, you reduce the time and effort spent searching for and retrieving tools and ingredients.
Prep Zone: This is typically a countertop area near your sink and cutting board. It’s where you’ll do most of your chopping, mixing, and ingredient preparation.
Cooking Zone: Centered around your stovetop and oven. This is where the actual cooking happens.
Baking Zone: If you bake frequently, a dedicated area for baking sheets, mixing bowls, flours, sugars, and baking tools can be incredibly helpful.
Storage Zone (Pantry/Refrigerator): Where your food supplies are kept.
Cleaning Zone: Around the sink, housing dish soap, sponges, dish towels, and cleaning supplies.
Serving Zone: Near the dining area or where you plate food, storing plates, bowls, and serving dishes.
How to Implement Zoning for Better Kitchen Organization
Identify Your Main Work Areas: Spend some time observing how you move and work in your kitchen. Where do you usually chop vegetables? Where do you mix ingredients? Where do you typically stand to cook?
Group Items by Function: Once you’ve identified your zones, start placing items that belong together within their respective areas. For example:
Prep Zone: Keep cutting boards, knives, measuring cups and spoons, mixing bowls, and frequently used prep tools (peelers, graters) in drawers or cabinets directly adjacent to your main prep counter.
Cooking Zone: Store pots, pans, lids, cooking utensils (spatulas, ladles, tongs), and frequently used spices and oils within arm’s reach of the stovetop. Magnetic knife strips near the stove can be great for quick access to knives.
Baking Zone: Dedicate a cabinet or drawer to baking essentials like flour, sugar, baking soda, vanilla, mixing bowls, cookie sheets, and cooling racks. If space allows, a dedicated countertop area for baking can be a game-changer.
Cleaning Zone: Keep dish soap, sponges, dish brushes, and dishwasher pods under the sink. Store dish towels nearby.
Serving Zone: Plates, bowls, glasses, and cutlery should be easily accessible from your dining area.
Consider Frequency of Use: Within each zone, place the most frequently used items in the easiest-to-reach spots. Items used less often can go higher up or further back in cabinets.
Utilize Proximity: Think about the flow of your kitchen. For example, if you often rinse vegetables before chopping, ensure your cutting board and knives are close to the sink. If you frequently use certain spices for cooking, keep them near the stove, not tucked away in a distant pantry.
Benefits of Zoning
By creating functional zones, you’ll find that your cooking process becomes significantly more efficient. You’ll spend less time walking around your kitchen, opening multiple cabinets, and searching for items. Everything you need for a particular task will be right where you expect it to be. This intelligent approach to kitchen organization not only saves time but also reduces stress and makes cooking a more enjoyable experience. It’s one of the most effective kitchen organization tips for improving overall kitchen workflow.
3. Maximize Vertical and Undersink Space
Once you’ve decluttered and established your zones, the next step in mastering kitchen organization is to think vertically and creatively, especially in often-underutilized areas like inside cabinets and under the sink. These spaces, if not properly managed, can quickly become black holes of clutter. Maximizing every inch of available space is crucial for smaller kitchens but beneficial for all.
Harnessing Vertical Space
Many cabinets and pantries have ample vertical space that goes unused, leading to stacked items that are hard to access. Here’s how to make the most of it:
Shelf Risers and Expandable Shelves: These are your best friends for cabinets with tall gaps between shelves. They allow you to create multiple levels, doubling or even tripling your storage capacity. Use them for plates, bowls, mugs, or even canned goods in the pantry.
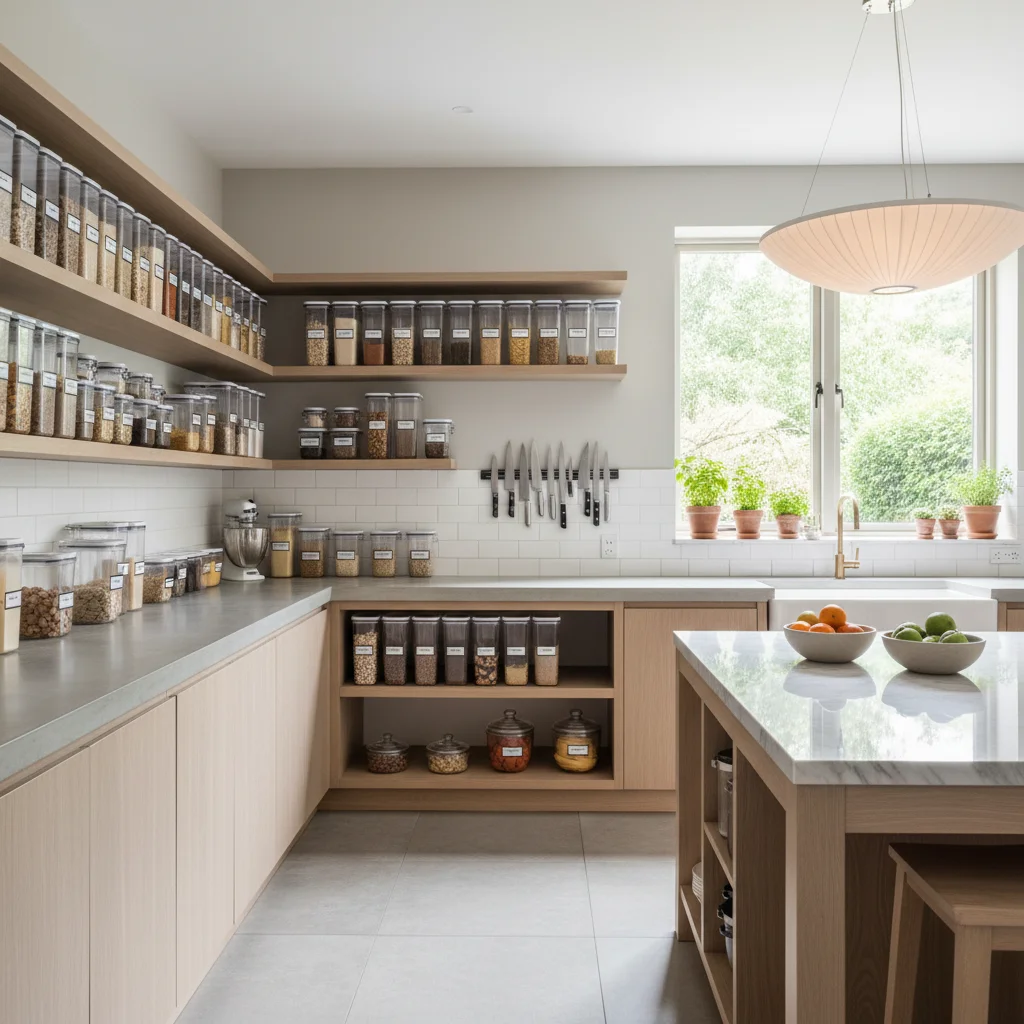
Stackable Bins and Containers: For pantry items, dry goods, or even snacks, stackable clear containers allow you to see contents at a glance while building upwards. Ensure they are uniform for a neat appearance and efficient stacking.
Wall-Mounted Storage: Don’t forget your walls! Magnetic knife strips free up drawer space and keep knives safely accessible. Wall-mounted spice racks, pot racks, or even pegboards can be incredibly effective for storing frequently used items, cooking utensils, or small pots and pans.
Over-the-Door Organizers: The back of pantry doors or cabinet doors can hold a surprising amount. Use over-the-door racks for spices, foil, plastic wrap, cleaning supplies, or even small snacks.
Pot and Pan Organizers: Instead of stacking pots and pans, which makes it difficult to retrieve the bottom one, use vertical organizers that allow you to store them on their sides or in separate slots. This saves space and prevents scratching.
Optimizing Undersink Space
The cabinet under the sink is notorious for becoming a jumbled mess of cleaning supplies and random items. It’s often an awkward space due to plumbing, but with smart solutions, it can be highly functional.
Pull-Out Organizers: These are game-changers for under-sink cabinets. They come in various configurations, often with two tiers, allowing you to easily access items at the back without having to reach around plumbing.
Stackable Bins and Drawers: Use clear, stackable bins to categorize cleaning supplies (e.g., glass cleaner, all-purpose cleaner, sponges) and contain smaller items.
Tension Rods: A simple tension rod can be installed across the cabinet to hang spray bottles, freeing up the bottom of the cabinet for other items.
Small Bins for Dishwashing Essentials: Keep a small caddy or bin with your everyday dish soap, sponges, and scrub brushes for easy access and to keep the area tidy.
Utilize Cabinet Doors: Stick-on hooks or small caddies can be attached to the inside of the cabinet doors to hold sponges, gloves, or small brushes.
By strategically implementing these vertical and undersink kitchen organization tips, you’ll unlock hidden storage potential in your kitchen. This not only creates more space but also ensures that every item is easily accessible, making your daily routines smoother and more enjoyable. Remember, a well-utilized space is a well-organized space.
4. Drawer and Cabinet Solutions: The Inside Story
Once your kitchen is decluttered and zoned, it’s time to dive into the nitty-gritty of internal organization – specifically, optimizing your drawers and cabinets. These are the workhorses of your kitchen storage, and without proper internal systems, they can quickly revert to chaos. Effective drawer and cabinet solutions are essential kitchen organization tips for maintaining long-term order and efficiency.
Taming the Drawers
Drawers are prime real estate in the kitchen, often housing frequently used items. Without dividers, they become catch-all spaces. Here’s how to bring order:
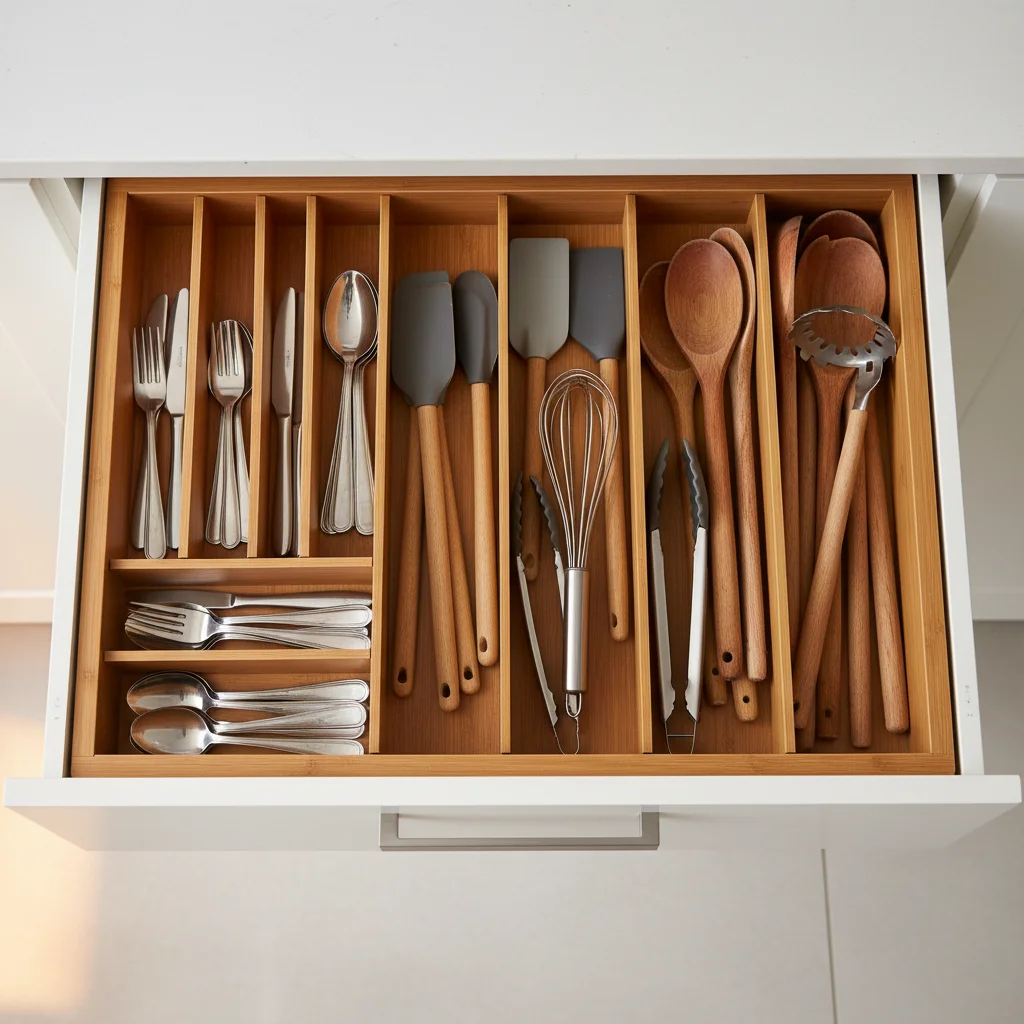
Utensil Organizers: This is a non-negotiable. Invest in good quality, expandable utensil organizers that fit your drawers perfectly. Dedicate sections for forks, spoons, knives, and smaller cooking utensils.
Adjustable Drawer Dividers: For larger drawers, adjustable dividers are fantastic. Use them to create custom compartments for larger cooking tools like spatulas, ladles, whisks, and even food storage container lids. This prevents items from sliding around and keeps them neatly separated.
Spice Drawer Inserts: If you prefer to store spices in a drawer, tiered spice drawer inserts allow you to lay bottles flat and see all labels at a glance. This is a highly efficient use of drawer space for spice organization.
Knife Blocks/Inserts: Instead of a bulky countertop knife block, consider in-drawer knife organizers. They keep your knives safe, sharp, and out of sight, freeing up valuable counter space.
Small Bins for Miscellaneous Items: For those odd-shaped items or smaller gadgets, small, shallow bins within a drawer can keep them contained and prevent them from migrating.
Conquering the Cabinets
Cabinets, especially deep ones, can be challenging. Items get lost in the back, leading to duplicates and wasted food. Smart solutions can make a world of difference:
Pull-Out Shelves or Drawers: For lower cabinets, particularly deep ones, pull-out shelves or drawers are invaluable. They bring the back of the cabinet to you, making every item accessible. These are especially useful for pots, pans, small appliances, or heavy pantry items.
Lazy Susans (Turntables): Corner cabinets and deep pantries are perfect candidates for lazy Susans. Use them for oils, vinegars, sauces, spices, or even cleaning supplies. They allow for 360-degree access to items that would otherwise be difficult to reach.
Food Storage Container Organization: This is a common pain point. Stack containers with their lids, or use a dedicated lid organizer. Consider investing in a uniform set of containers to simplify stacking and storage.
Vertical Dividers: For items like baking sheets, cutting boards, and platters, vertical dividers (either built-in or aftermarket) keep them upright and easily accessible, preventing them from toppling over.
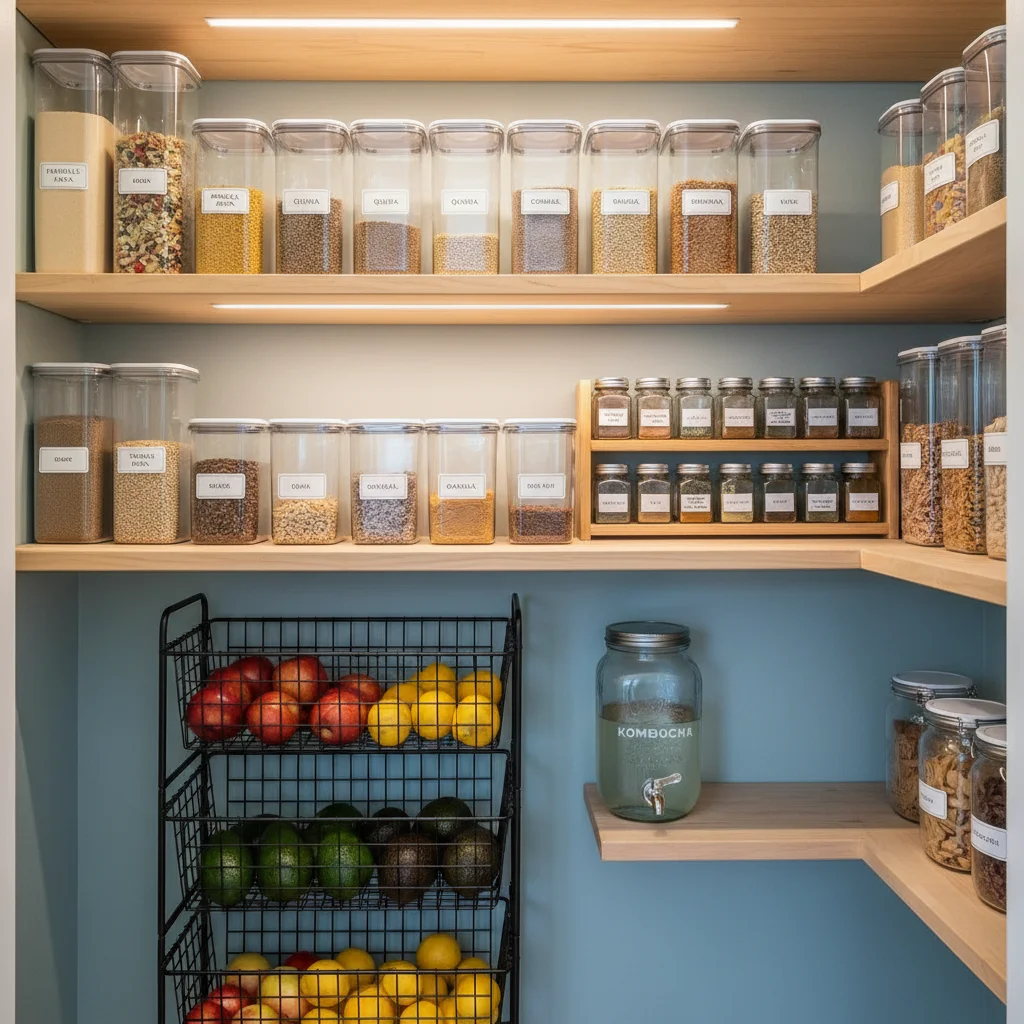
Clear Bins and Labels: In pantry cabinets, use clear, stackable bins to group similar items (e.g., ‘baking supplies,’ ‘breakfast foods,’ ‘snacks’). Labeling these bins clearly helps everyone in the household know where things belong and makes it easy to find what you need. This is a top-tier kitchen organization tip for a reason!
Decanting Dry Goods: For a truly organized pantry, consider decanting dry goods like pasta, rice, flour, and sugar into uniform, airtight containers. This not only looks aesthetically pleasing but also keeps food fresh, prevents pests, and allows you to see inventory at a glance.
The Power of Consistency
The key to successful drawer and cabinet organization is consistency. Once you’ve implemented these solutions, commit to putting items back in their designated spots. This discipline will ensure that your hard work pays off and your kitchen remains a model of efficiency. These internal organization strategies are vital kitchen organization tips that will dramatically improve your daily cooking experience.
5. Maintain and Adapt: The Key to Lasting Kitchen Organization
You’ve decluttered, zoned your kitchen, maximized vertical space, and optimized your drawers and cabinets. Congratulations! This is a significant achievement. However, the journey to a perfectly organized kitchen doesn’t end there. The final, and arguably most crucial, step in effective kitchen organization is ongoing maintenance and the willingness to adapt your systems as your needs evolve. Without this commitment, even the best organizational efforts can unravel over time.
The Importance of Routine Maintenance
Think of your kitchen organization system not as a one-time project, but as a living system that requires regular attention. Just like a garden, it needs tending to thrive. Here are some maintenance kitchen organization tips:
The ‘One-Minute Tidy’ Rule: At the end of each cooking session or before bed, spend just one minute putting items back in their place, wiping down counters, and clearing the sink. This prevents small messes from escalating into overwhelming clutter.
Weekly Quick Scan: Dedicate 10-15 minutes once a week to a quick scan of your kitchen. Check for items that have strayed from their zones, wipe down any sticky jars in the pantry, and ensure everything is where it should be.
Monthly Deep Dive (Optional): Once a month, you might want to do a slightly deeper check: reorganize a single drawer or cabinet, check expiration dates in the pantry, or clean out your refrigerator. This prevents major clean-outs later.
Put Things Away Immediately: This is perhaps the most impactful habit. When you finish using an item, put it back in its designated spot immediately. Don’t leave it on the counter ‘for later.’ This simple habit prevents clutter from accumulating.
Involve the Household: If you live with others, ensure everyone understands and respects the organizational system. Clearly label bins and shelves, and communicate expectations. When everyone is on board, maintenance becomes much easier.
Adapting Your System
Life changes, and so do our needs. Your kitchen organization system should be flexible enough to adapt to these changes. What works perfectly today might need tweaking six months from now.
New Appliances or Gadgets: If you buy a new blender or an Instant Pot, where will it live? Don’t just shove it in an already full cabinet. Take a moment to reassess and create a logical home for it, even if it means re-evaluating another item.
Changes in Cooking Habits: Are you baking more? Trying new cuisines? Your spice collection or baking supplies might grow. Be prepared to adjust your zones or storage solutions accordingly.
Seasonal Adjustments: You might use certain items more frequently in different seasons (e.g., grilling tools in summer, baking dishes in winter). Consider rotating items to the front based on seasonal use.
Family Growth or Changes: A new baby might mean more baby food storage. Kids growing up might mean more snack zones. Your kitchen needs to evolve with your family.
Regular Review: Every six months or annually, take a critical look at your entire kitchen. What’s working? What isn’t? Are there any persistent problem areas? Use this opportunity to refine your system, declutter again, and implement new solutions if necessary.
The Enduring Benefits of Maintenance and Adaptation
By making maintenance a habit and being open to adaptation, you ensure that your kitchen remains a functional, stress-free, and enjoyable space for years to come. This continuous effort is what truly distinguishes a temporarily tidy kitchen from a genuinely organized and efficient one. These kitchen organization tips, particularly the emphasis on ongoing care, are what guarantee lasting success and a kitchen you’ll love to spend time in.
Conclusion: Your Journey to a More Efficient Kitchen
Embarking on the journey of kitchen organization can seem overwhelming at first, but by breaking it down into manageable steps, you can achieve remarkable results. We’ve explored five essential kitchen organization tips that form a robust framework for transforming your culinary space: the grand purge to eliminate clutter, strategic zoning to create functional workstations, maximizing vertical and undersink spaces, optimizing drawers and cabinets with smart solutions, and finally, the crucial commitment to ongoing maintenance and adaptation.
Each of these steps builds upon the last, creating a cohesive and highly efficient system. By applying these kitchen organization tips, you’re not just tidying up; you’re fundamentally changing how you interact with your kitchen. You’ll find yourself spending less time searching for items, reducing waste from forgotten ingredients, and enjoying a smoother, more enjoyable cooking process.
Remember, a perfectly organized kitchen is not about achieving a magazine-perfect look, but about creating a space that works for you and your lifestyle. It’s about functionality, ease of use, and reducing daily friction. Start small if you need to, perhaps tackling just one drawer or cabinet at a time. The key is to begin and to be consistent.
Embrace the process, celebrate your progress, and enjoy the profound benefits that a well-organized kitchen brings to your home and your peace of mind. With these expert kitchen organization tips, you are well-equipped to create a culinary haven that is both beautiful and incredibly efficient. Happy organizing!
Matheus Neiva has a degree in Communication and a specialization in Digital Marketing. Working as a writer, he dedicates himself to researching and creating informative content, always seeking to convey information clearly and accurately to the public.